Lesson # Technical drawing (part 2)
Technical Drawing
Whether you are a designer working in the fashion industry who has some ability in fashion sketching or a newcomer with moderate drawing skills, fashion sketches are great for relaying an impression of your design ideas. They look lovely in a sketchbook and portfolio.
Should you choose to take these designs to the next level and have patterns made, followed by samples and production, your beautiful sketch will be useless.
The people responsible to turn your idea into a finished, fit-for-purpose product, need detailed clear drawings so they can produce your vision accurately.
So let’s break it down and have a look at what technical drawings are, why they’re important, where and how they’re used and how to draw them.

What are technical drawings:
Technical drawings are a fundamental necessity for a designer trying to relay their design blueprint.
In the fashion industry, where the product must be made accurately, you’d be hard-pressed to find a pattern cutter who would work with you without them as the design sketch can sometimes lead to inaccurate proportions.
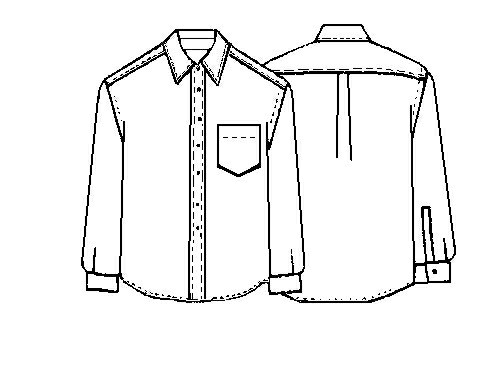
Simply put, they’re a two-dimensional linear, diagrammatical rendition of your designs drawn in solid lines, depicting as much detail as possible.
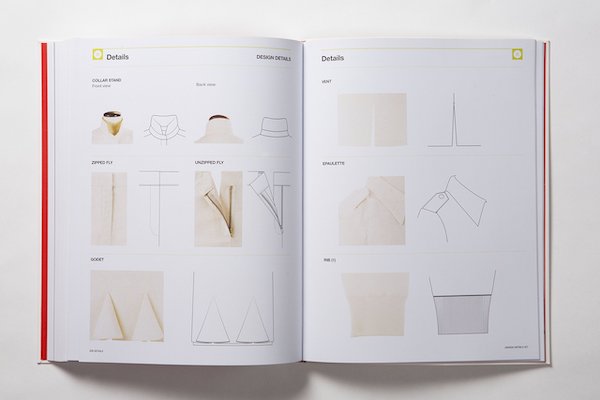
They are graphic, clearly drawn explanations of the product, showing all the construction details, such as seams, darts, pockets, fastenings, and topstitching.
No figure is represented in these drawings, but they are drawn to scale with no indication of texture, color, or form. Often referred to as “flat drawings” or simply “flats,” the name is derived from the fact that they resemble a garment laid flat on a flat surface and sketched.
It is expected and customary when you draw these technical drawings to do a front and back view of your product at a minimum.
But if you are creating a complicated garment or developing bags, shoes, or jewelry, additional views will need to be provided to ensure that your products are re-created from the drawing as you’ve designed them.
Why They’re Important:
Once you begin to create technical drawings, you may find that your designs change slightly when compared to the original design sketch.
The technical drawing allows you to keep design lines and details in real size as the drawings are presented with correct body proportions.
This is useful to create balance and harmony and also allows you to see how the item will look once it has been produced.
Additionally, a technical drawing can be used as a template if drawn by hand and scanned into the computer or if rendered in Adobe Illustrator for adding color and texture ideas.

How They’re Used:
Technical drawings are an important component to aid the conversion of your design sketch into a usable product.
Your pattern cutters will need these drawings to create a pattern that fits well on the body, is in proportion and is balanced, and is aesthetically pleasing.
Technical drawings form part of your tech pack and specification sheets and need incredible amounts of detail on them to enable the factory to make what you need.
Technical drawings can also be used online line sheets when showing your products to shops. They’re useful for representing a simple, graphic rendition of your product and this enables the buyer to see the detail.
CONCLUSION
When drawing a technical drawing what is important to bear in mind is that they are like a textbook or a music sheet that one can read and tell a story from. Your drawing must equally speak to the pattern cutter and factory working on your product. therefore below are our Top Tips to help you along:
- Add as much detail to your drawings as possible as omitting parts of the sketch will only make your job harder in the long term when explaining the design to your team.
- Include every seam, stitch, dart, and fastening.
- A solid line on a garment represents a seam line.
- A dashed line represents stitching.
- Draw every detail if you’re creating custom embroidery, print, or beading.
- Develop detailed templates that show the inside of the garment or product that refers to label placement, inside pockets, and anything else that could get lost in translation.
- Garment sketches should have a front and back view. Also, include additional sketches of the functionality of the garment.
- Accessories require a front, back, side, top, bottom, and ¾ view.
- Keep your sketches simple and devoid of movement or shading as it can be distracting.
- Always provide a clear representation of your designs by rendering them in black and white.